Make Your Own Canned Foods Rack For Your Pantry Shelves
Anchor Hocking
48oz Stacking Square Glass Jars
The perfect solution for keeping all kinds of pantry food items - honey, rice, dried beans, grains, so much more!
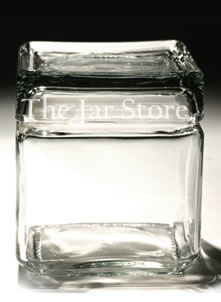
These handy stackable square jars maximize your available shelf space around and above! There's no wasted space, as with round jars. The lids are recessed on top for secure stacking. They're double-rib sealed, but slip off and on easily - no more fooling with threaded jar tops! Easy to see what's inside - because they're made of glass, the best material for keeping food fresh and critter-free. Order Yours Now
- $6.49 ea, plus shipping.
Easy Free Plans
Here's a simple-to-make solution to one problem of pantry shelf clutter - stacks of canned food. A can rack made of common materials that takes little skill and just a few tools to make will help organize those crowded shelves.
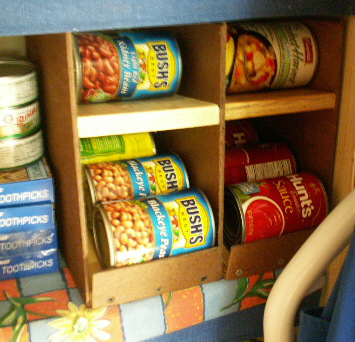
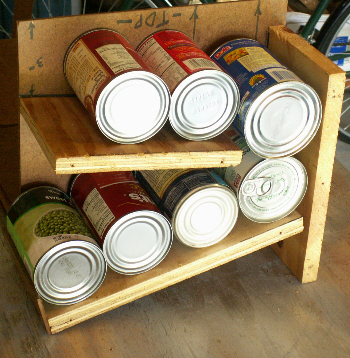
The photo below shows the prototype with one side removed, so you can see how the cans are held in place and allowed to roll. You may need to adjust the dimensions so the rack will fit your shelf space, but the general design and steps to build the racks(s) will still apply.
Step 2
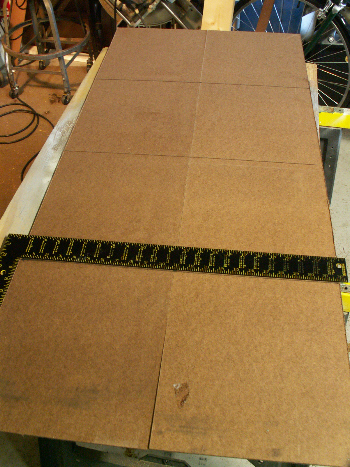
Mark and cut the 11-inch wide hardboard strips into 12-inch lengths. This will leave you with 8 pieces measuring 11" x 12".
These will be sides for 4 racks.
Step 4
We need to cut the back and shelf pieces from the 1x6 board.
- Cut the back board 11" long.
- Cut the bottom shelf 11 1/4 inches long.
- Cut the top shelf 7 1/2 inches.
From the 2-inch wide strip of hardboard, cut a piece the width of the bottom shelf, and attach it with drywall screws to the front end of the bottom shelf.
This will serve as a stop for the cans.
Now we're ready to assemble the first rack.
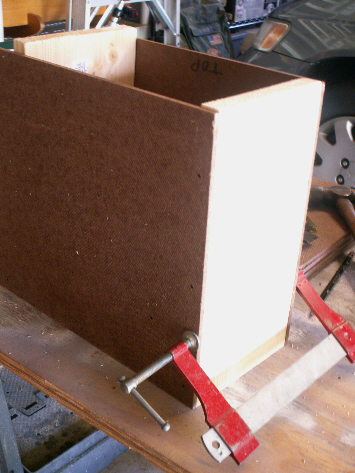
The easiest way is to clamp the two sides and back pieces together.
Position the back flush with the sides, and be sure the rack sets flat without rocking, as in the photo below.
Then drive the screws in.
Just repeat the steps above to make 3 more from the remaining materials.
Materials needed are one 24" by 48" sheet of hardboard (sometimes called Masonite, or pressed board), 3/16 inch thick, and two 1x6 pine boards 6 feet long.
These are available from any home supply store.
One-inch drywall screws can be used to hold all the pieces together.
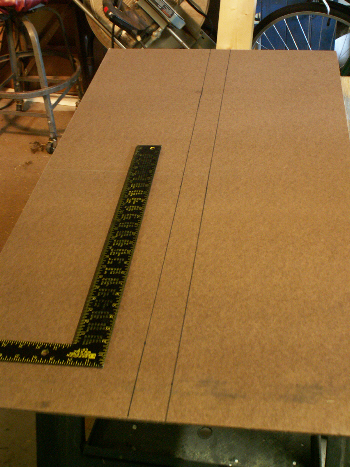
Step 1
Start by marking out 11" wide strips on the hardboard, leaving a 2" strip. The narrow strip will be used to make stops for the cans. Saw along the lines with a Skill saw or hand saw.
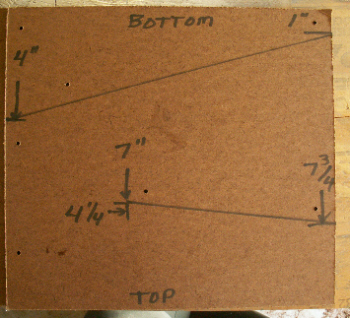
Step 3
The next step is to mark the shelf positions for a side of one rack.
Use the measurements in the photo below, and mark heavy lines that will be easy to see when you position the shelves.
Notice where the holes were drilled.
If you want to save a little work, after you've marked one piece, stack 4 side pieces and drill the holes through all of them at once.
Mark the shelf positions for the other side of your first rack.
Step 5
Position the shelves by aligning them with the lines you drew in Step 3. Set the screws for the bottom shelf, and clamp the top shelf in position.
Try feeding a couple cans through to be sure they don't get stuck in the back.
If that happens, you'll have to re-position the top shelf a little. Then, set the screws for the top shelf, and behold your new canned foods rack!
